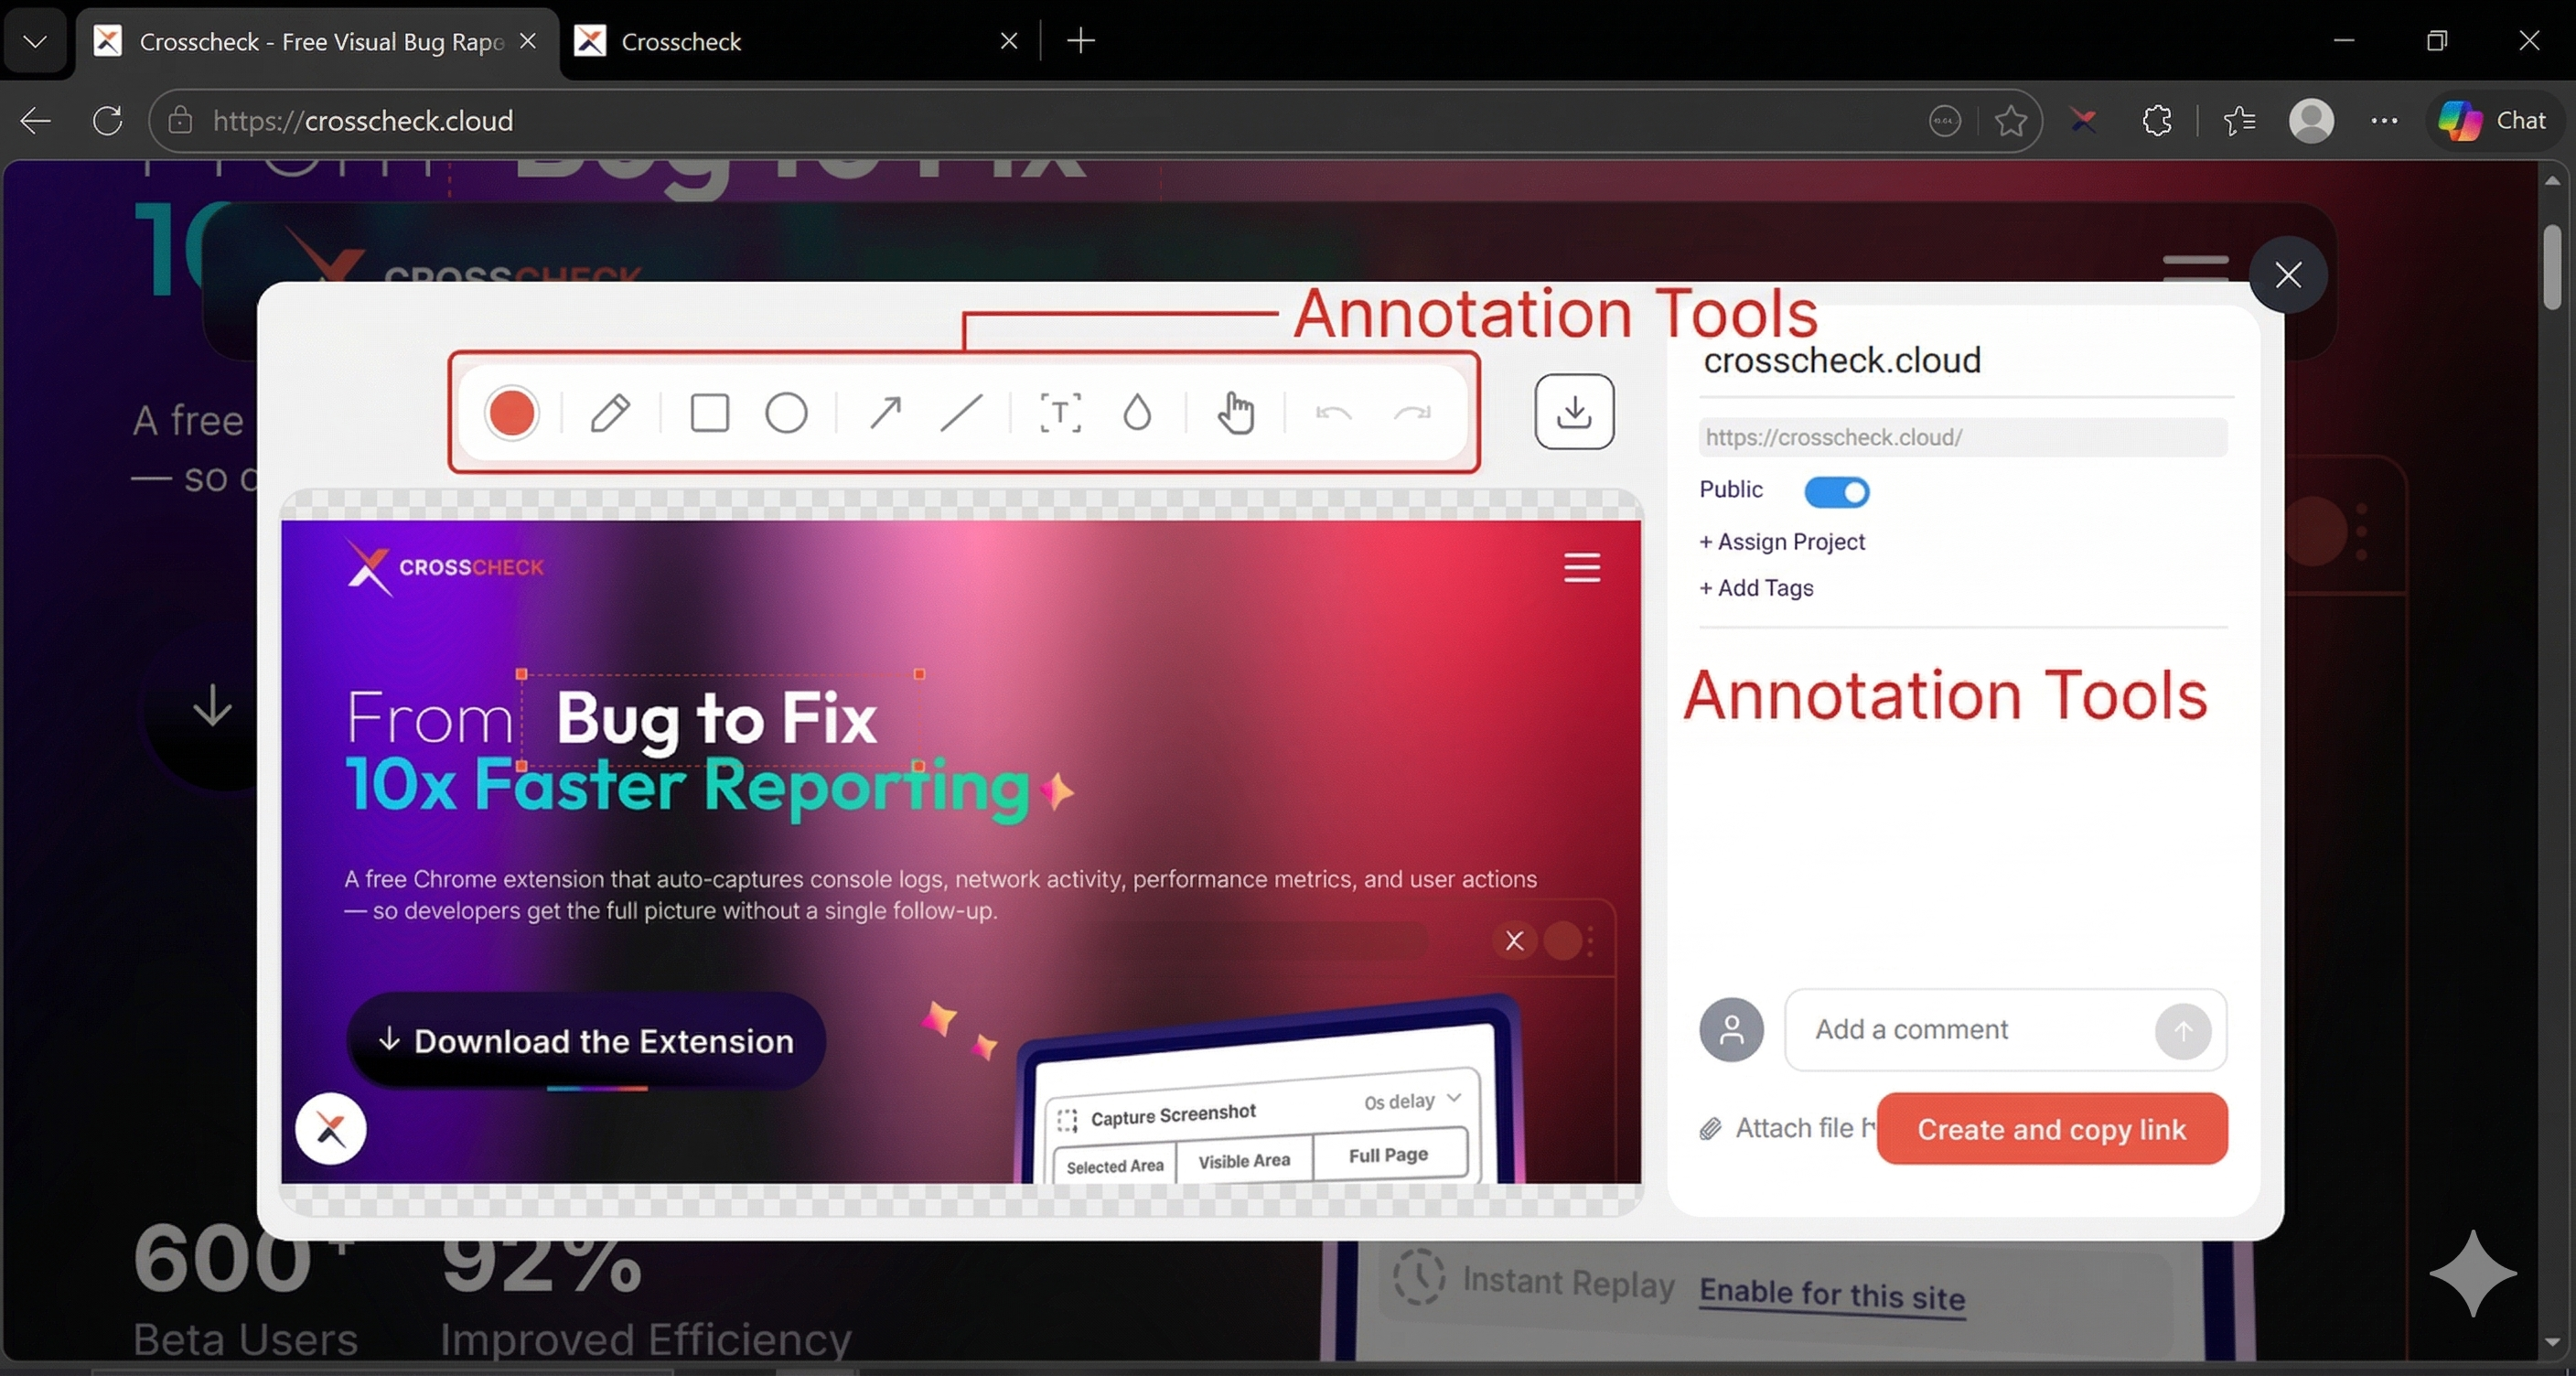
Annotation & Markup
Crosscheck includes a powerful annotation editor. After capturing a screenshot, you can mark up the image with drawings, text, arrows, shapes, and blur effects before saving or sharing it.
Annotation Tools
The toolbar provides the following tools. Each tool can be combined with the color picker and adjusted for stroke width.
| Tool | Description | Usage |
|---|---|---|
| Color Picker | Choose the color used by every annotation you draw next | Click the color swatch in the toolbar and pick a color before drawing |
| Pen | Draw freehand on the screenshot | Select the pen and drag across the canvas to sketch |
| Rectangle | Draw a rectangle to box off an area | Click and drag to define the rectangle area |
| Ellipse | Draw a circle or ellipse to highlight a region | Click and drag to define the ellipse size and position |
| Arrow | Point at a specific element to draw attention to it | Click and drag from the start point to the arrow head |
| Line | Draw a straight line for callouts or measurements | Click and drag from the start point to the end point |
| Focus / Spotlight | Dim everything except the area you want the viewer to see | Select the focus tool and drag over the region to spotlight |
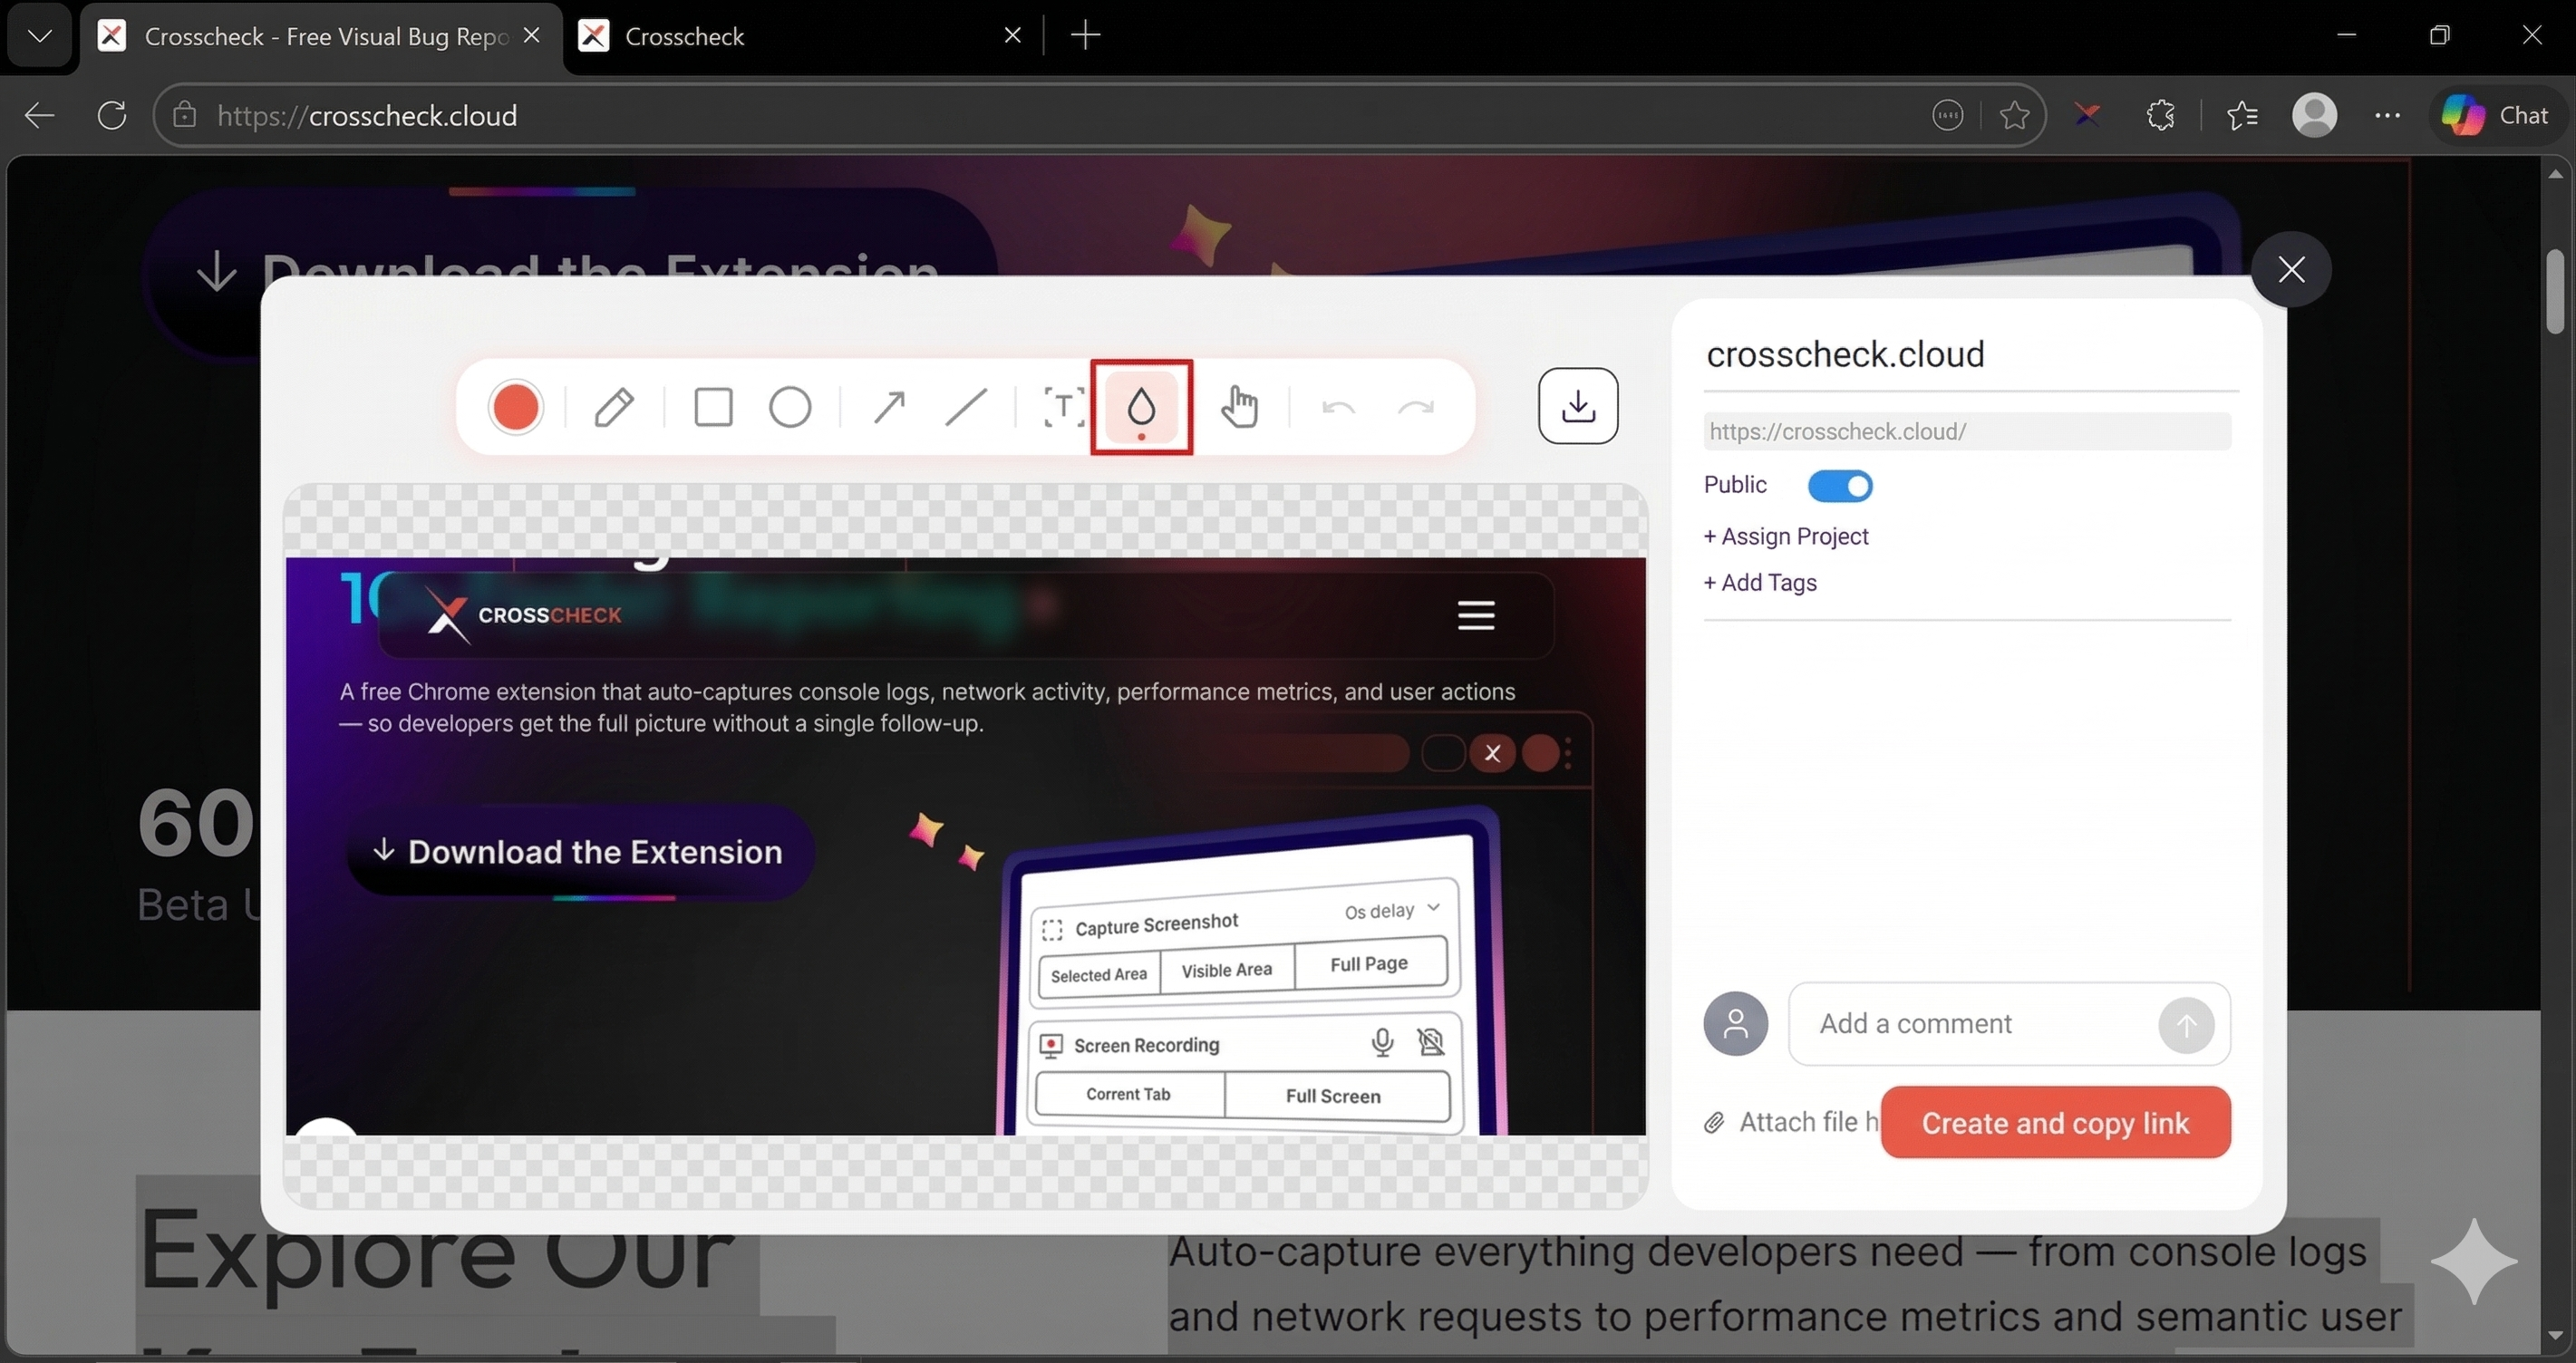
| Blur | Pixelate sensitive information like emails, names, or tokens before sharing | Select the blur tool and drag over the area you want to hide |
| Hand / Move | Pan around the screenshot without drawing | Select the hand tool and drag to reposition the canvas view |
| Undo / Redo | Step backward or forward through your annotation history | Click the undo or redo button in the toolbar |
Tool Overview
Choose the color used by every annotation you draw next.
Draw freehand to highlight areas, circle bugs, or sketch quick notes.
Draw a rectangle to box off an area of the screenshot.
Draw a circle or ellipse to highlight a region.
Point at a specific UI element to draw attention to it.
Draw a straight line for callouts or measurements.
Dim everything except the area you want the viewer to see.
Pixelate sensitive information like emails, names, or tokens before sharing.
Pan around the screenshot without drawing on it.
Step back or forward through your annotation history.
How to Annotate a Screenshot
Capture a screenshot
Select a tool
Pick a color
Draw on the canvas
Undo mistakes
Save and share
Blurring Sensitive Information
The blur/pixelate tool lets you obscure any part of the screenshot before sharing. This is useful for hiding passwords, API keys, personal information, or any confidential data visible in the check.
Select the blur tool
Drag over the area
Adjust if needed
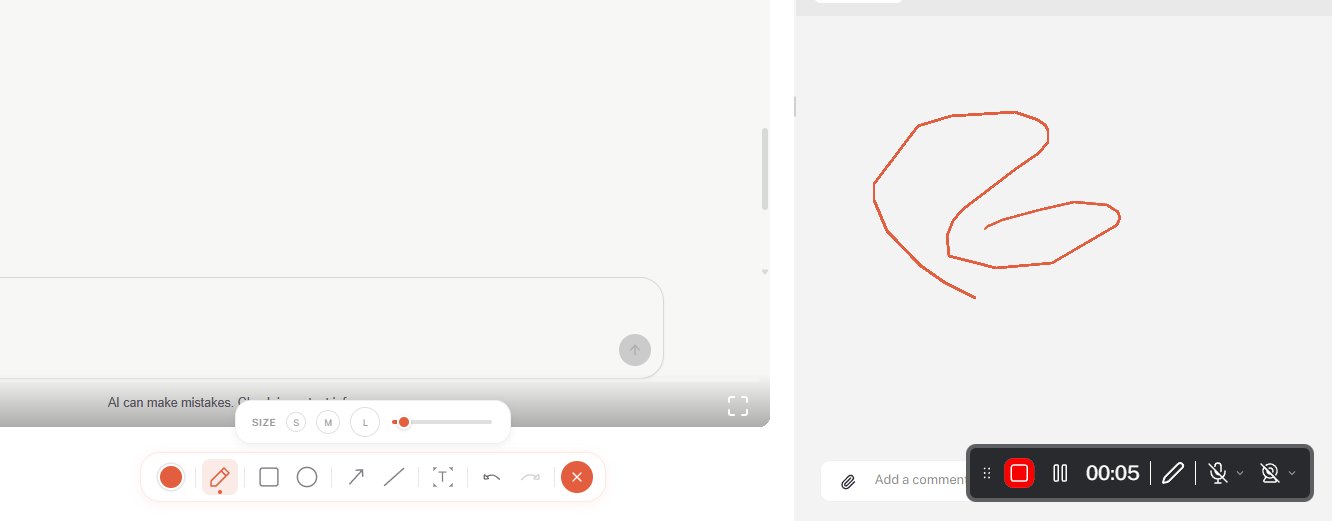
Annotating During a Live Recording
You can also annotate while a screen recording is in progress. Anything you draw appears on top of the page in real time and is captured as part of the recording, so reviewers see the annotations play back exactly when you made them.
Start a screen recording
Use the live annotator
Pick a tool and draw on the page
- Pen — Draw freehand directly on the page.
- Rectangle and Ellipse — Frame areas of interest while you talk through them.
- Arrow and Line — Point at specific UI elements as you reproduce the bug.
- Text — Drop quick callouts on screen without pausing the recording.
Adjust color and stroke size
Undo or clear mistakes
Stop the recording