
Extension Settings
The Crosscheck extension settings let you customize link privacy, on-page UI elements, DevTools recording behavior, and Instant Replay preferences. All settings are synced to your account and apply across devices.
How to Access Settings
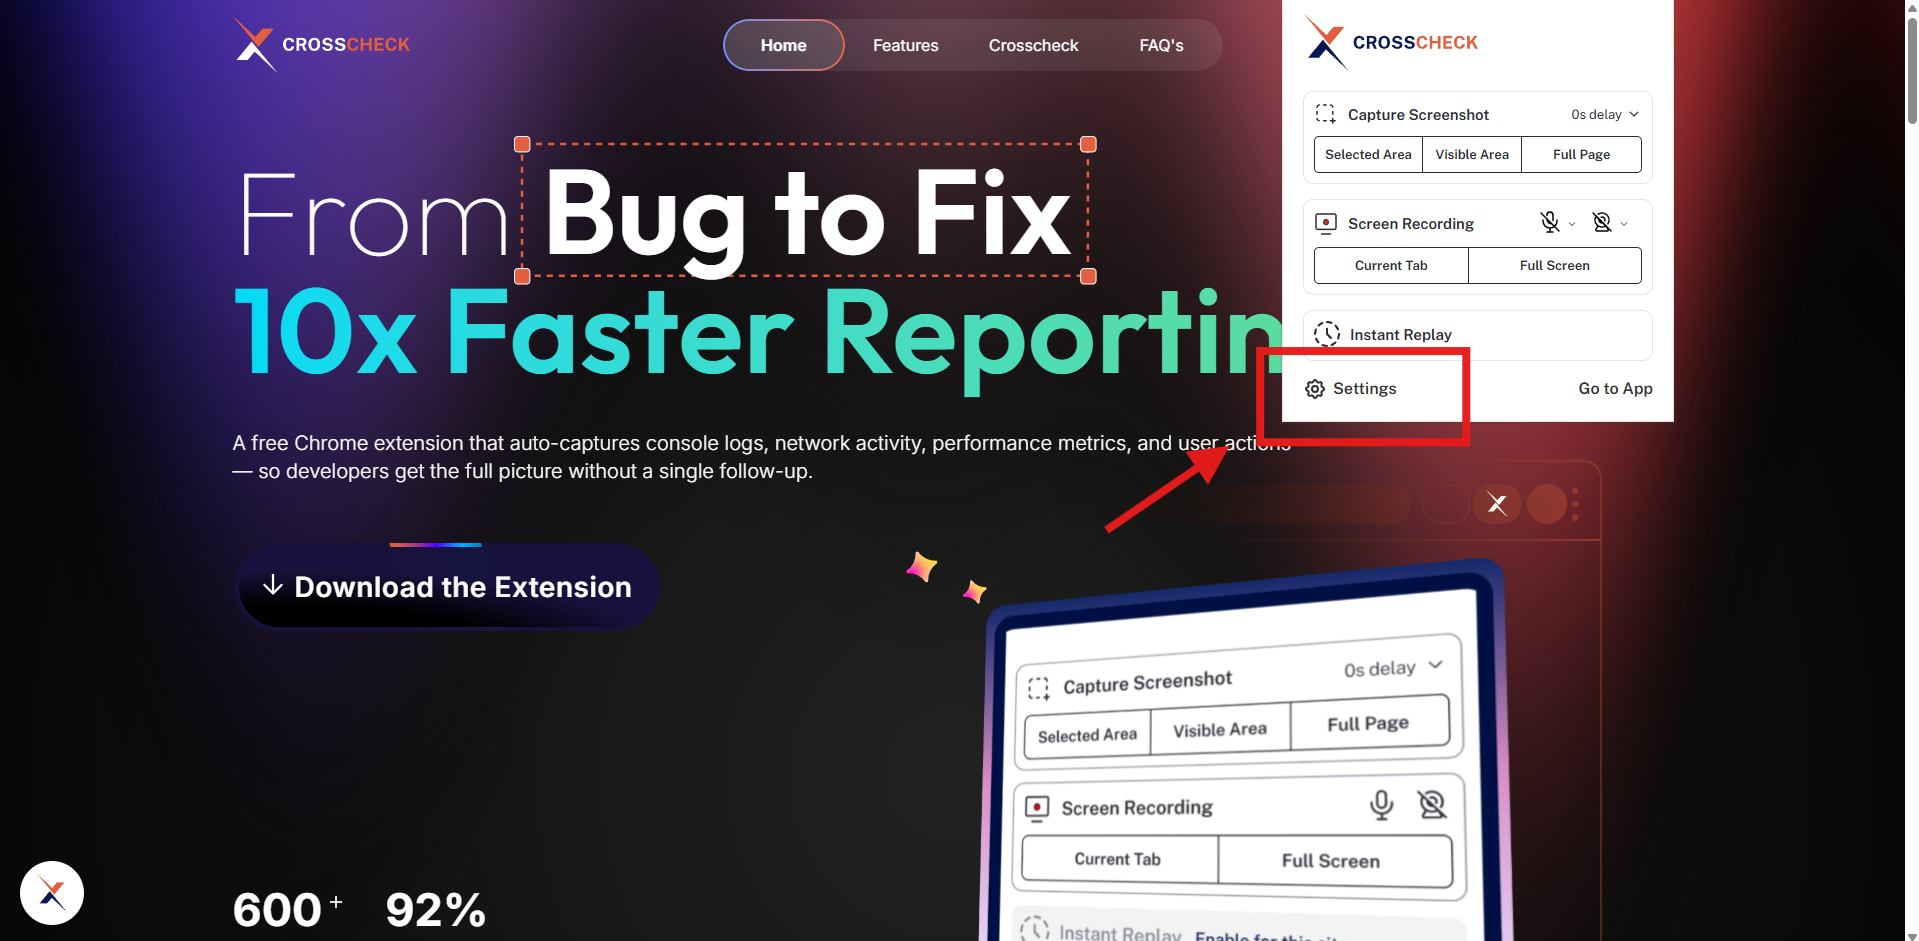
Open the extension popup
Click the settings gear
Settings Overview
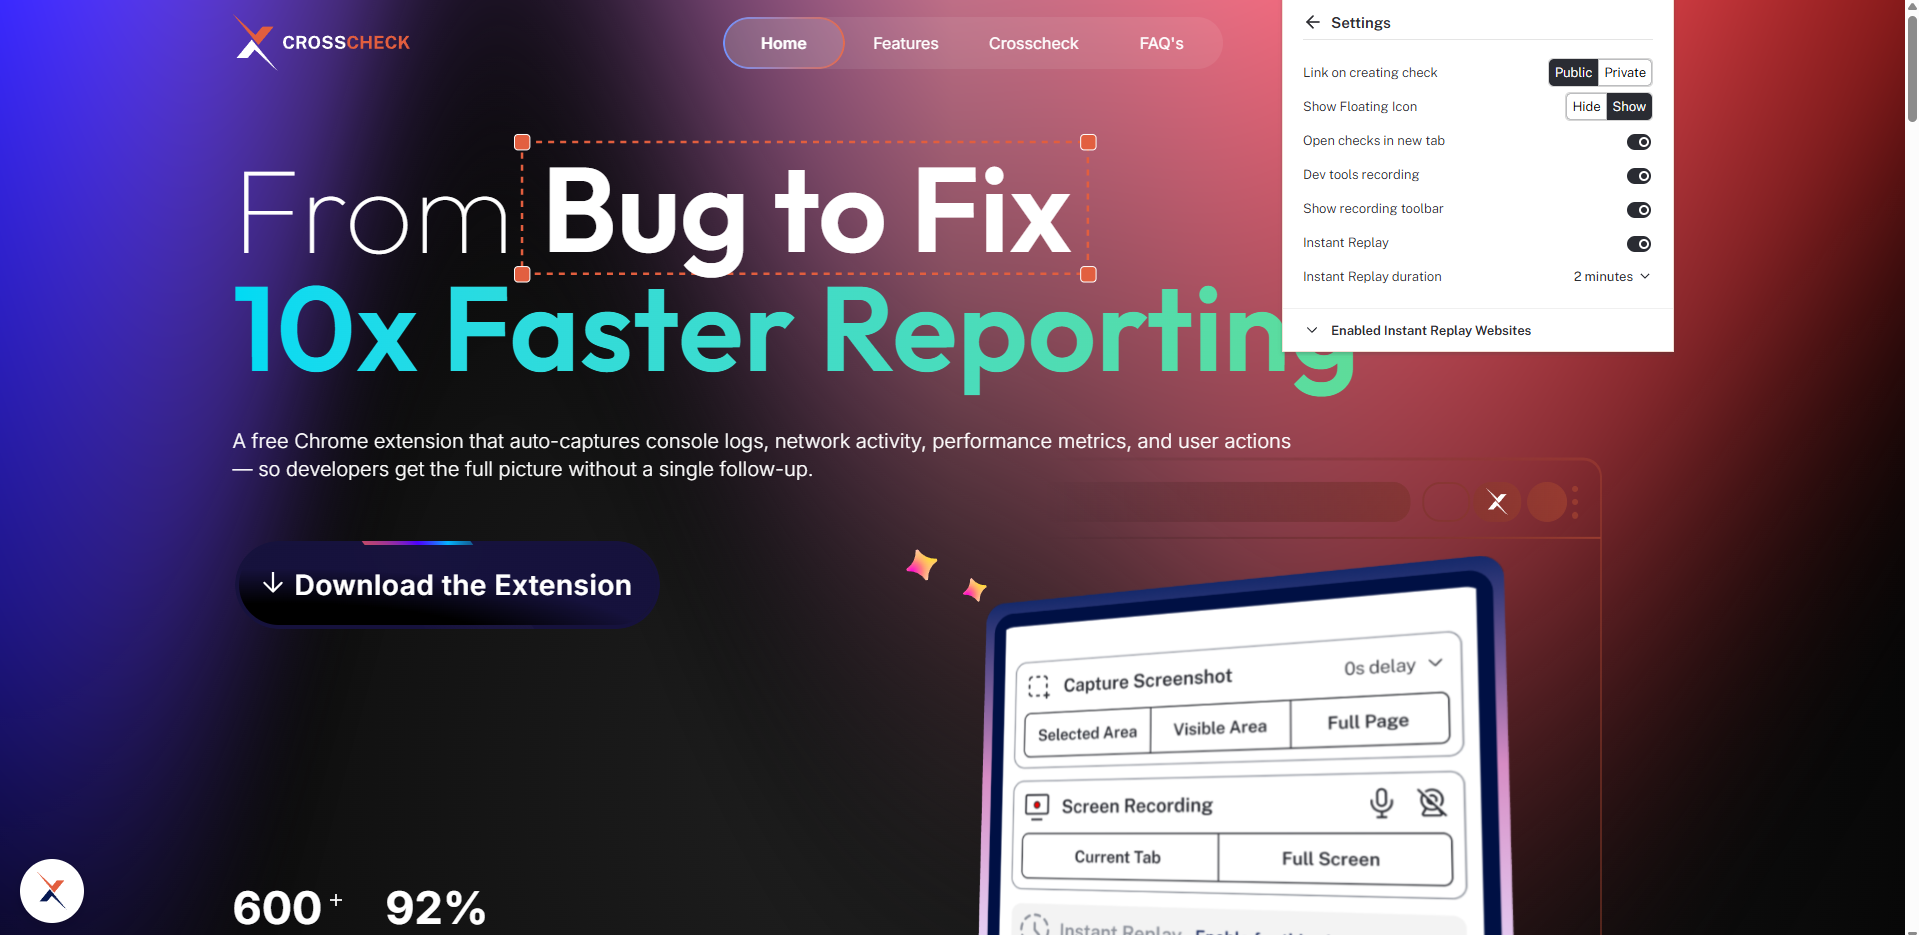
Choose whether new checks default to Public or Private visibility.
Show or hide the on-page Crosscheck icon that expands into quick-launch buttons for Screenshot, Screen Recording, and Instant Replay.
Automatically open the check link in a new browser tab after creation.
Capture console logs, network requests, user actions, and performance metrics alongside your checks.
Show or hide the floating toolbar that appears during screen recordings.
Toggle Instant Replay on or off globally, set the replay duration (1–5 minutes), and configure per-site enabling.
Link Privacy
Labelled Link on creating check in the popup, this setting controls the default visibility for every new check you create. Use the segmented control to switch between Public and Private.
| Option | Behavior |
|---|---|
| Public | Anyone with the check link can view it without signing in |
| Private | Only workspace members and explicitly invited users can view the check |
Floating Icon
Labelled Show Floating Icon in the popup. When set to Show, the Crosscheck logo appears as a small floating icon on every web page. Clicking it expands a quick-launch menu with one-tap buttons for Screenshot, Screen Recording, and Instant Replay, plus a Hide Icon shortcut to dismiss it without opening settings. Switch the setting to Hide to remove the floating icon from all pages.
Open Checks in New Tab
Labelled Open checks in new tab in the popup. Enable the toggle to have Crosscheck automatically open each newly created check in a new browser tab right after the check is saved. Disable it to keep your current tab focused.
DevTools Recording
Labelled Dev tools recording in the popup. Enable the toggle to capture developer context alongside your checks; disable it to record only the screenshot or video. When enabled, the extension records:
- Console logs — errors, warnings, info, and log messages from the browser console.
- Network requests — HTTP requests with URL, method, status code, and timing.
- User actions — clicks, keypresses, and page navigations.
- Performance metrics — page load timing and runtime performance data.
Recording Toolbar
Labelled Show recording toolbar in the popup. Enable the toggle to show the floating toolbar (pause, stop, mic, camera, annotate, and timer) during screen recordings. Disable it to keep the recording surface clean — you can still stop the recording from the extension popup.
Instant Replay
Instant Replay continuously buffers recent page activity so you can save it after something unexpected happens. The settings panel provides three controls for Instant Replay:
Global Toggle
Labelled Instant Replay in the popup. Enable the toggle to turn Instant Replay on globally; disable it to stop buffering any page activity regardless of per-site settings.
Replay Duration
Labelled Instant Replay duration in the popup. Click the dropdown to pick how much activity to keep in the replay buffer — 1, 2, 3, 4, or 5 minutes. A longer buffer captures more context but uses slightly more memory.
| Duration | Use Case |
|---|---|
| 1 minute | Quick bugs that are easy to reproduce |
| 2 minutes | General-purpose default for most workflows |
| 3 minutes | Multi-step flows that take longer to trigger |
| 4-5 minutes | Complex scenarios with extended setup steps |
Enabled Websites
Found under the Enabled Instant Replay Websites section in the popup. Instead of running Instant Replay on every website, you can enable it only on specific URLs — staging environments, development servers, or any site where you want the replay buffer active.