Integrations

Jira

The Jira integration lets you create Jira tickets directly from any check in Crosscheck. It uses OAuth to securely connect your Jira site, and supports configurable fields so tickets are created with the right project, issue type, and assignee.

Connecting Jira

Crosscheck connects to Jira through OAuth. Each workspace member connects their own Jira account.

Before you connect
Make sure you already have a Jira site set up and are signed in to your Atlassian account in the same browser. If you do not have a site yet, create one at atlassian.com first — this makes the OAuth handshake smoother and ensures Crosscheck has a site to link to.
1

Open the Integrations page

Click Integrations in the sidebar of the Crosscheck dashboard. You will see a list of available integrations, including Clickup and Jira.
2

Click Connect next to Jira

On the Jira row, click the Connect button on the right. You will be redirected to Atlassian to authorize Crosscheck.
3

Authorize Crosscheck Cloud on Atlassian

On the Atlassian consent screen, you will see “Crosscheck Cloud is requesting access to your Atlassian account” along with the site it will use (for example, your-site.atlassian.net) and the requested Jira permissions. Review the details and click Accept.
4

Confirm the connection

You will be redirected back to the Integrations page in Crosscheck. A “Jira integration successful” toast will appear and the Jira row will now show Connected with a menu for managing the connection.
Per-user connection
Each workspace member connects their own Jira account. This means different team members can be connected to different Jira sites if needed.

Creating a Jira Ticket from a Check

Once Jira is connected, you can create a Jira ticket from any check in two ways: directly from the grid view, or from inside the check detail view. Both paths open the same Create Jira Task dialog.

Option 1 — From the grid view

1

Open the kebab menu on a check card

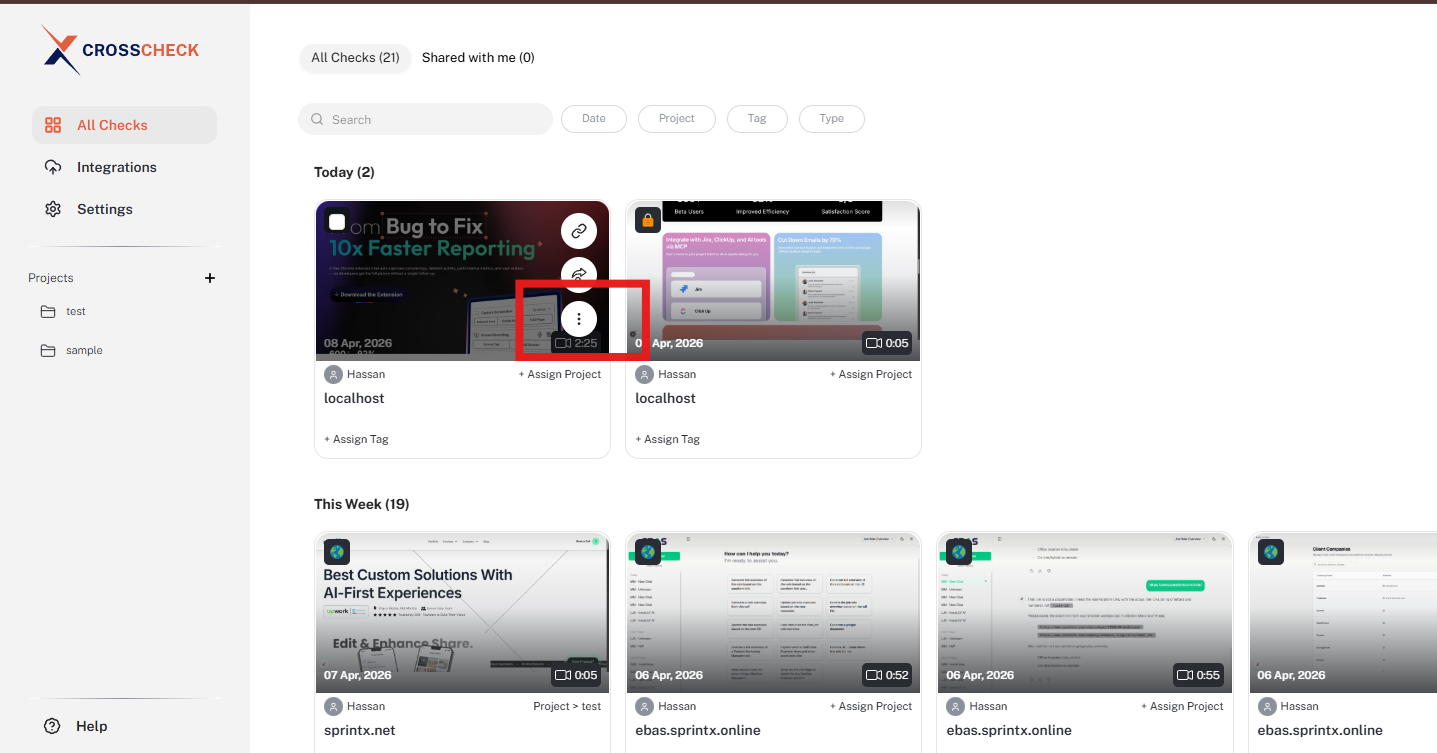
On the All Checks grid, hover over the check you want to report and click the (kebab) icon on the thumbnail.
Kebab menu icon highlighted on a check thumbnail in the grid view
Click the kebab icon on a check card to open its actions menu.
2

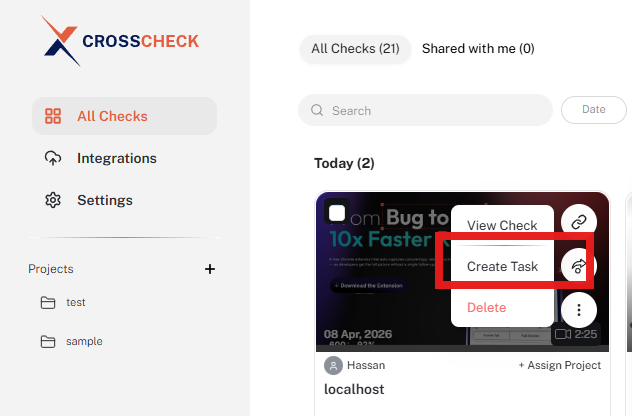
Click Create Task

From the menu, select Create Task.
Create Task option highlighted in the check actions menu
Choose Create Task from the check's actions menu.
3

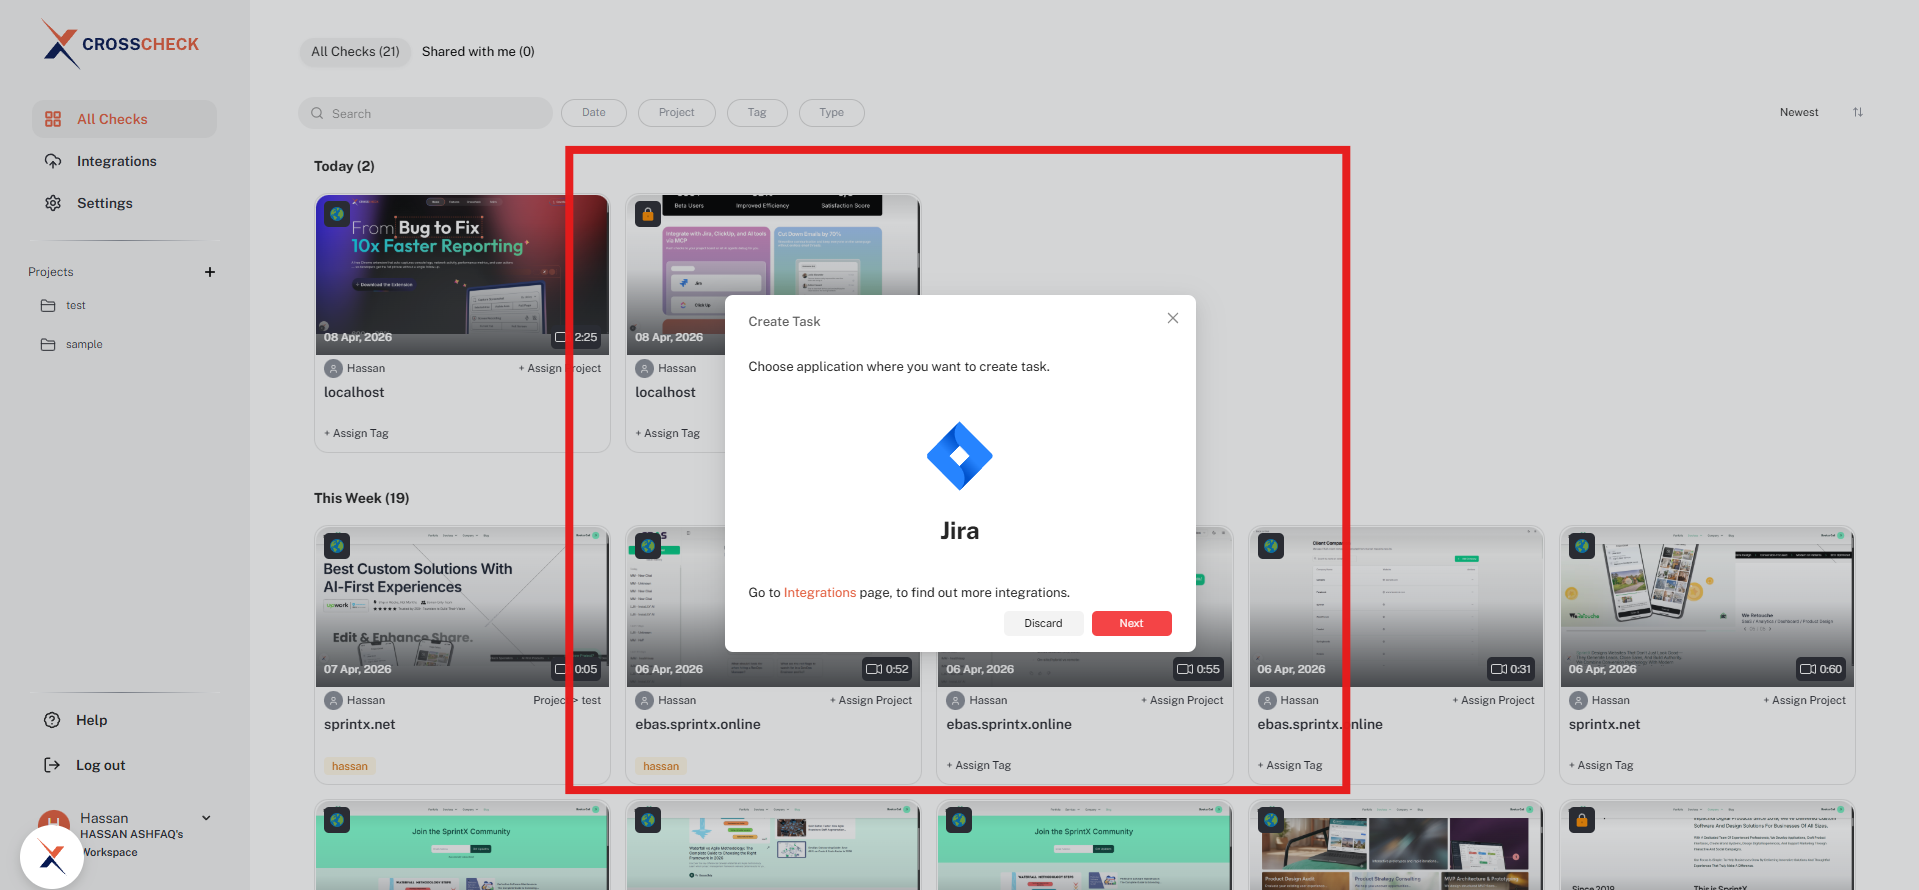
Choose Jira as the application

The Create Task dialog asks where you want to create the task. Select Jira and click Next. If you have not connected Jira yet, use the Integrations link in the dialog to set it up first.
Create Task dialog with Jira selected as the target application
Pick Jira as the target application, then click Next.

Option 2 — From the check detail view

1

Open a check

Click any check in the grid to open its detail view.
2

Open the actions menu and click Create Task
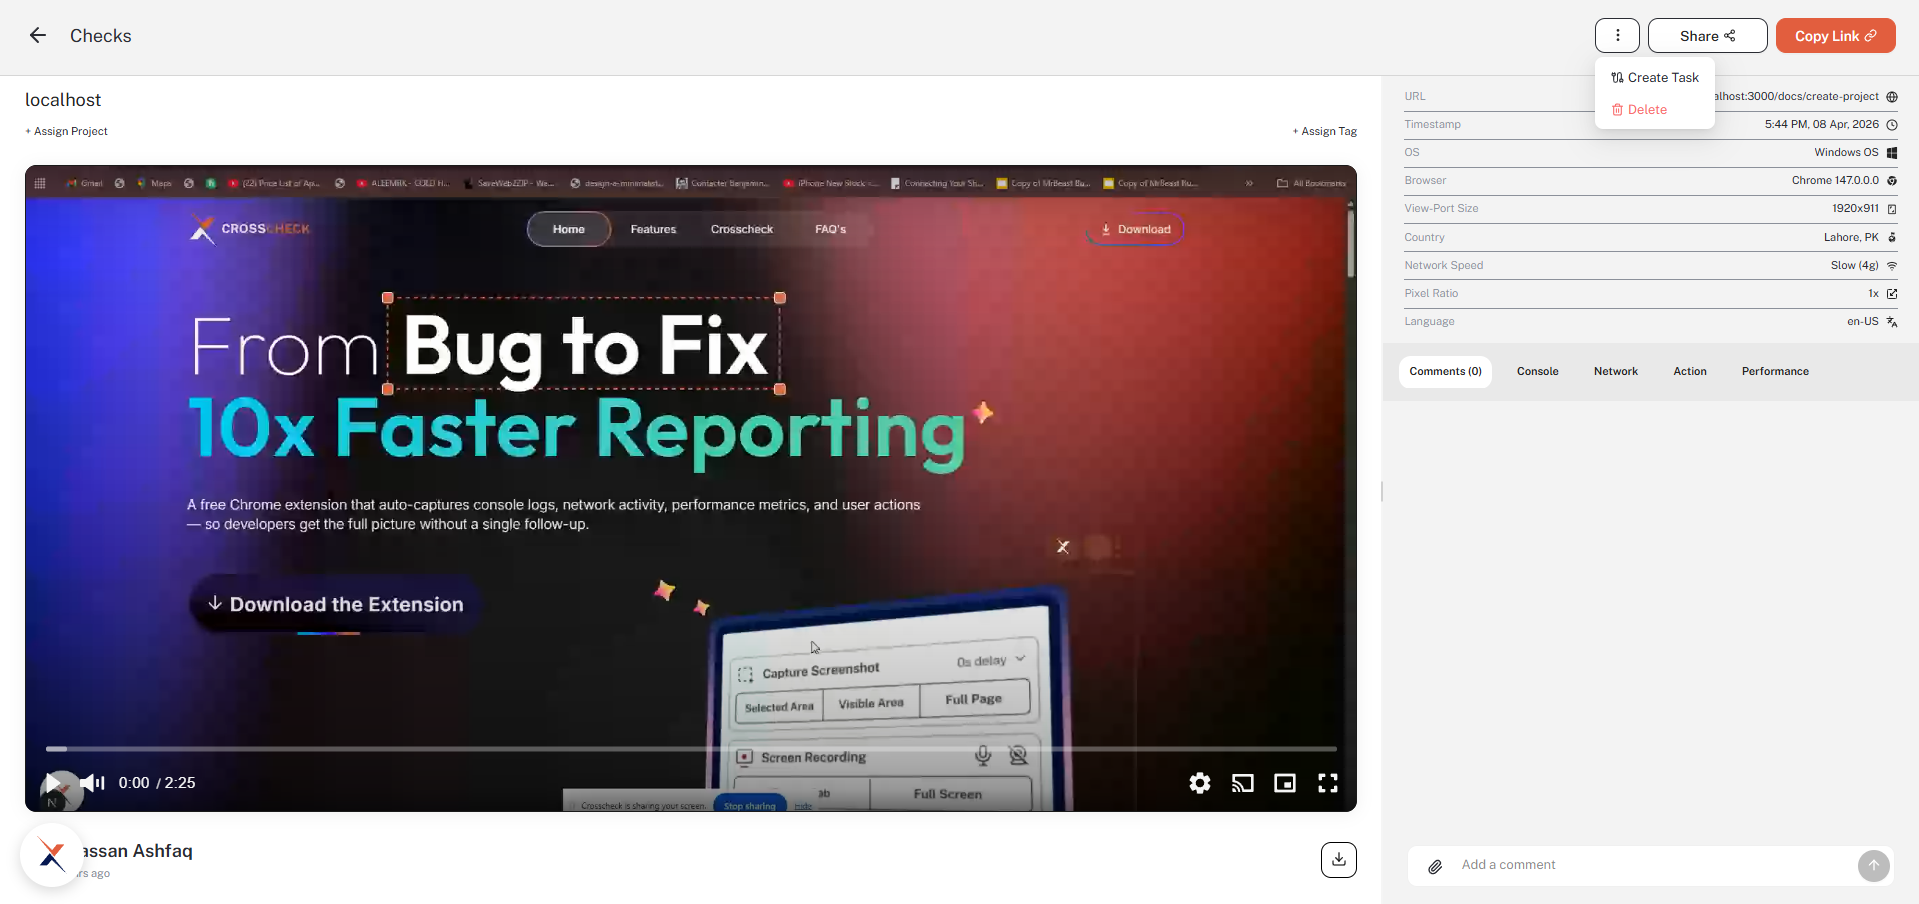
In the top-right of the detail view, click the menu next to Share and Copy Link, then choose Create Task. The same Create Task dialog will open — pick Jira and click Next to continue.
Create Task option in the check detail view actions menu
From the detail view, the kebab menu also exposes Create Task.

Filling in the Create Jira Task form

After selecting Jira from either entry point, the Create Jira Task form opens. Fill it in step by step:

1

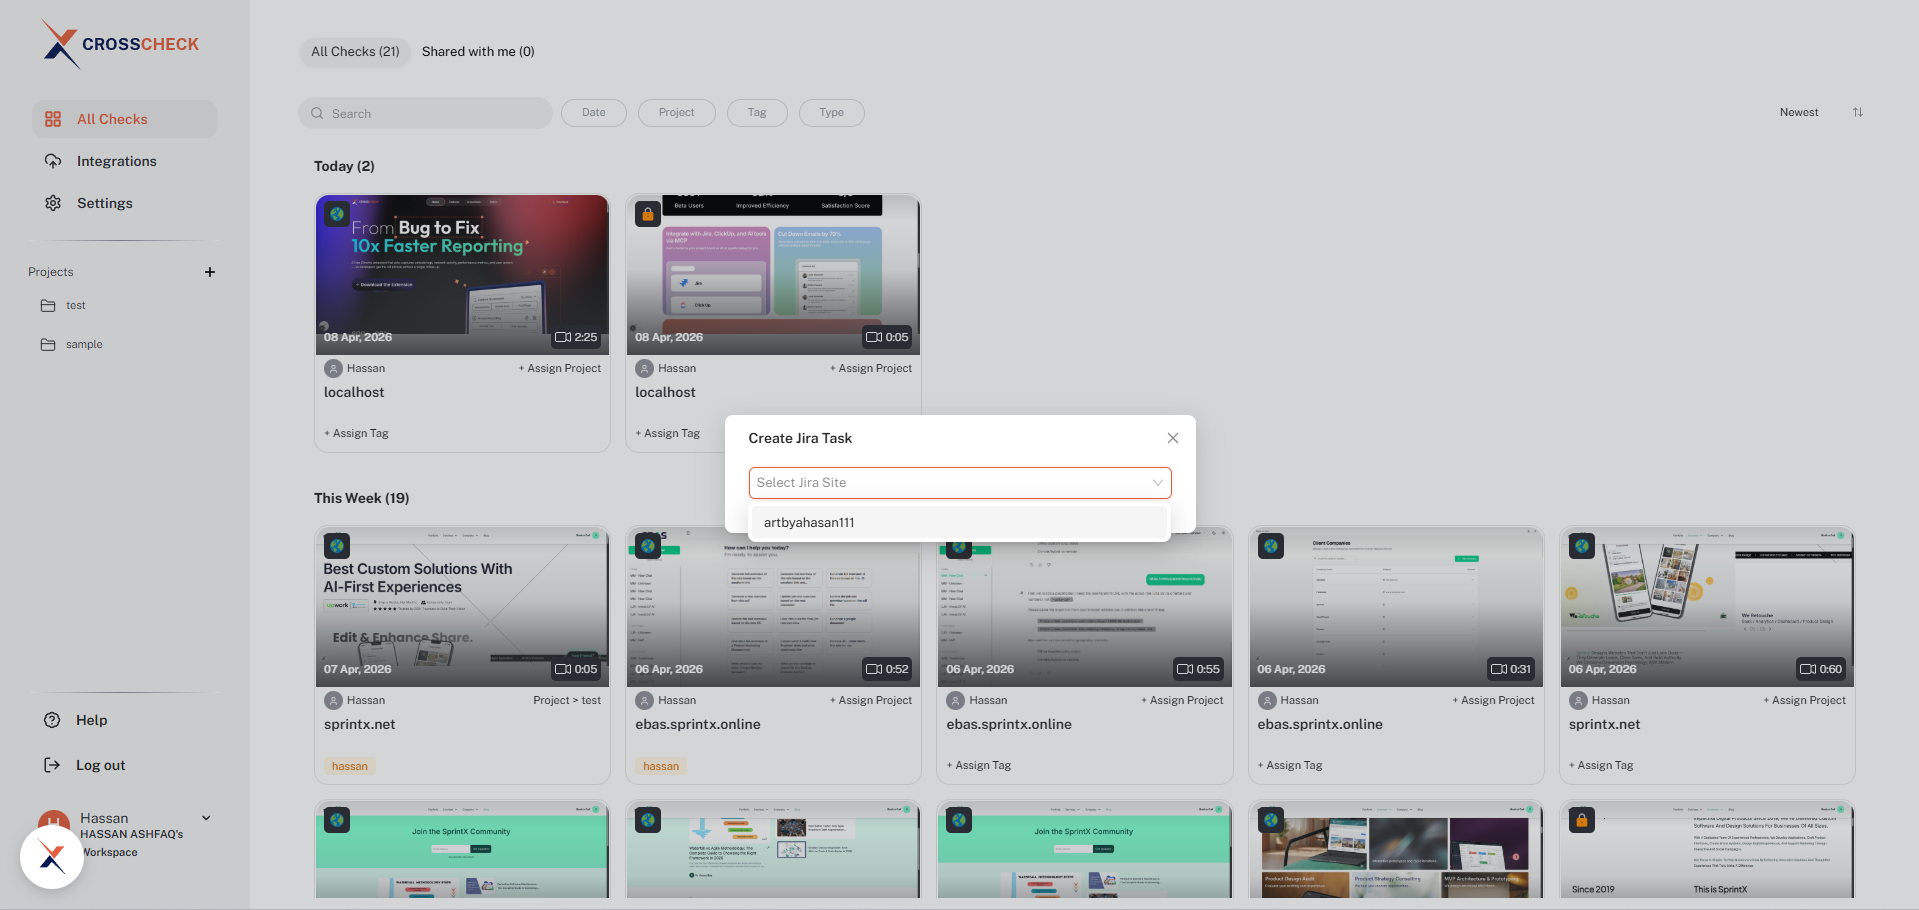
Select a Jira site

If your Atlassian account has access to multiple Jira sites, choose the one you want to create the ticket in from the Select Jira Site dropdown.
Create Jira Task dialog with the Select Jira Site dropdown open
Pick the Jira site where the ticket should be created.
2

Select a project

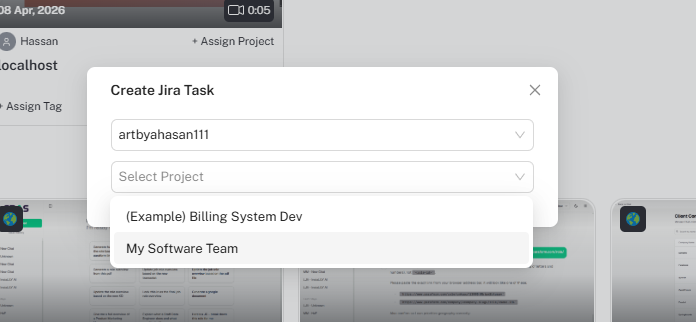
Choose the Jira Project the ticket should belong to. The dropdown lists every project available on the selected site.
Project dropdown showing available Jira projects
Select the destination Jira project.
3

Fill in the ticket details

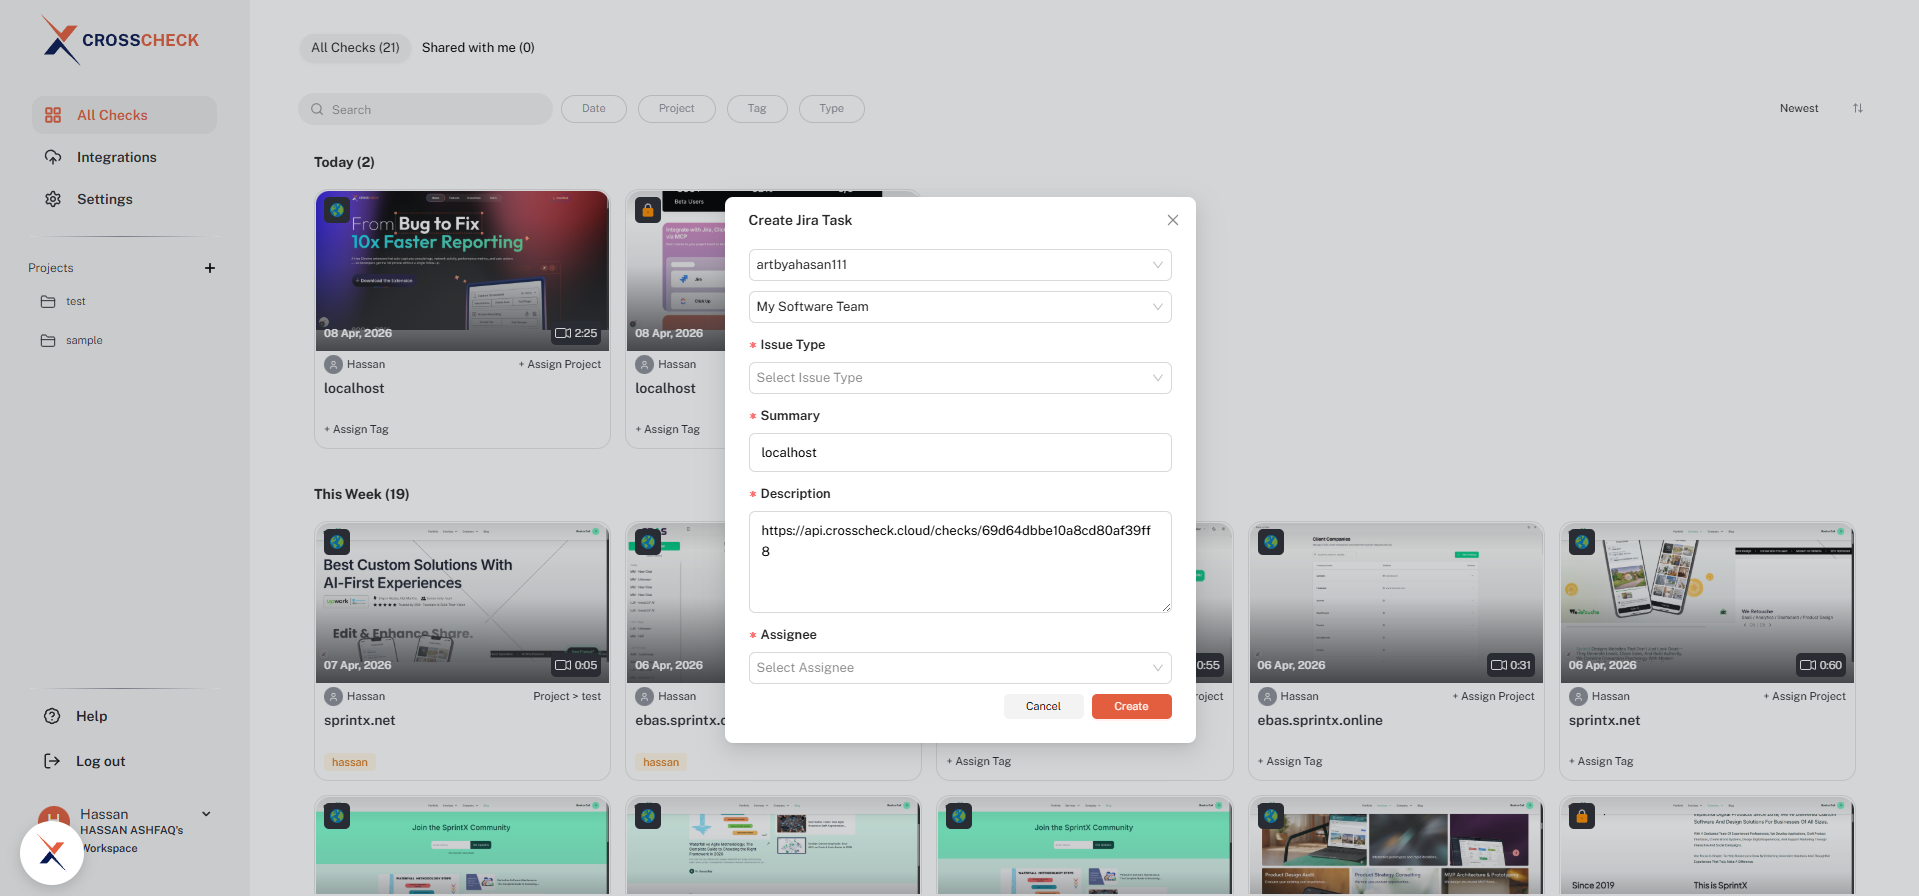
Pick an Issue Type (Bug, Task, Story, etc.), confirm or edit the Summary (pre-filled with the check name), review the Description (pre-filled with a link back to the check in Crosscheck), and pick an Assignee.
Completed Create Jira Task form with all fields filled in
The full Create Jira Task form with site, project, issue type, summary, description, and assignee.
4

Create the ticket

Click Create. The Jira ticket is created on the selected site and project, and a link back to it is stored on the check in Crosscheck.

Configurable Fields

FieldDescriptionRequired
ProjectThe Jira project where the ticket will be createdYes
Issue TypeBug, Task, Story, or other issue types from your Jira projectYes
SummaryThe ticket title. Defaults to the check name.Yes
DescriptionPre-filled with a link to the check in CrosscheckNo
AssigneeAssign the ticket to a Jira userNo

Disconnecting Jira

Open Integrations from the sidebar. On the Jira row, click the menu next to Connected to reveal two options:

  • Reconnect — re-run the OAuth flow, for example to switch to a different Jira account or site.
  • Disconnect — remove the Jira connection from Crosscheck. Previously created tickets will remain in Jira.
Individual connections
Each workspace member manages their own Jira connection. Connect your Jira account from the Integrations page to start creating tickets from checks.
Last updated: March 2026