Tags & Organization
Tags are short labels you attach to checks so you can categorize and filter them across your workspace. Each check can carry one tag at a time, and every tag you create is shared with the rest of your workspace and becomes available in the dashboard tag filter.
Where You Can Tag a Check
Crosscheck gives you four equivalent entry points for assigning a tag — they all open the same tag picker:
- From the grid view — Click + Assign Tag below any check card on the All Checks or project view.
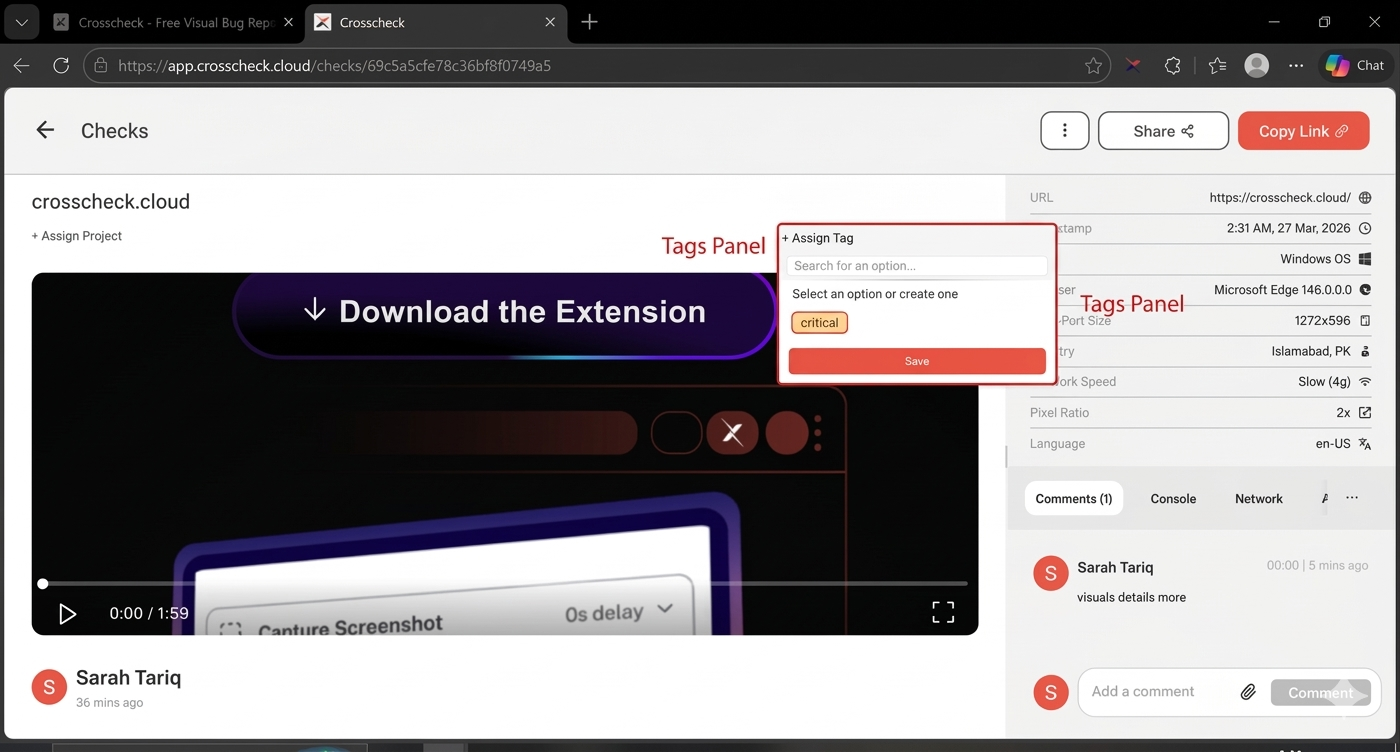
- From the check detail view — Click + Assign Tag in the title row at the top right of any open check.
- From the check preview — When you finish a screenshot, screen recording, or instant replay, the preview side panel includes a tag selector so you can assign or create a tag before clicking Create and copy link.
- From the Tag filter — Existing tags also appear in the Tag filter chip on the dashboard for quick filtering (see below).
Assigning a Tag
Open the tag picker
Pick an existing tag or create a new one
- If a matching workspace tag exists, click it under Select an option or create one.
- If no tag matches, a Create "your tag" option appears — click it, or press Enter, to create a brand-new tag inline.
Save the tag
Tag Properties
| Property | Description |
|---|---|
| Name | A short label describing the category (e.g. "Critical", "UI Bug", "hassan") |
| Scope | Tags are workspace-level — created once, shared with every workspace member |
| Per check | Each check carries a single tag at a time; saving a new tag replaces the previous one |
Filtering by Tag
Every tag you create immediately becomes available in the Tag filter chip above the checks grid. Click the chip to open the dropdown, pick a tag from the list (search by name if you have many), and the grid narrows to only the checks carrying that tag.
The Tag filter combines with the other filter chips — Date, Project, and Type — and the search box, so you can build precise views like "all Recording checks tagged hassan from this week."