JavaScript Debugging Tips Every Developer Should Know in 2026
The fastest way to debug JavaScript in 2026 is to stop typing console.log and start using the rest of the toolkit — conditional breakpoints, logpoints, async stack traces, monitorEvents, the $0–$4 element references, Node.js --inspect. JavaScript is still the most-used language on the planet — 66% of developers reach for it daily per the Stack Overflow Developer Survey 2025 — yet most debugging affordances Chrome DevTools has shipped since 2019 never get opened. This guide walks through the 15 JS debugging techniques that move the needle, with concrete examples for each.
TL;DR — the techniques that pay back fastest:
- Conditional breakpoints to skip 10,000 loop iterations and pause only when
items[i].status === 'failed'. - Logpoints to log values without editing source or shipping
console.logto production. monitorEvents($0, 'mouse')to see every event a DOM node fires, no listener setup needed.- Async stack traces to trace a rejection back across
awaitboundaries to the call that started it. node --inspect-brk app.jsto debug a Node.js process in the same DevTools you already know.- Source maps so production stack traces point at your TypeScript, not
main.abc123.min.js:1:48291.
Why console.log debugging hits a wall
console.log is the first tool every JavaScript developer reaches for, and for a five-line script it's fine. The problem is when the bug lives inside a forEach over 8,000 records, a Promise chain that resolves three ticks later, or a React effect with a stale closure. You end up adding logs, refreshing, removing logs, adding more specific logs, and committing one of them to main by accident.
Chrome DevTools, Firefox DevTools, and the Node.js inspector all expose the richer surface the V8 and Chromium teams use internally. Learning it once pays back every time you open the browser.
Advanced console methods that replace 90% of console.log
The console object exposes around 20 methods. Most developers use one. The seven below earn their keep.
console.table for arrays of objects
When you log an API response or a state snapshot, the default view collapses everything into nested trees. console.table renders it as columns and rows:
const users = [
  { id: 1, name: 'Alice', role: 'admin' },
  { id: 2, name: 'Bob', role: 'editor' },
  { id: 3, name: 'Carol', role: 'viewer' },
];
console.table(users);
console.table(users, ['name', 'role']); // project specific columns
For data-heavy debugging — comparing API responses, scanning a list for the row that's wrong — this single method probably saves more time than any other console trick.
console.dir to see an element as an object
console.log(element) shows the HTML representation. console.dir(element) flips the view to every JavaScript property — including framework-attached ones like Vue's __vueParentComponent or React's fiber node.
console.group and console.groupCollapsed
In a flat stream, ten messages from one request mingle with ten from another. Wrapping related logs in a group fixes that:
console.group('Order processing #4821');
console.log('Validating cart...');
console.group('Payment');
console.log('Charging card...');
console.log('Payment confirmed');
console.groupEnd();
console.groupEnd();
console.groupCollapsed starts collapsed — useful for noisy subsystems you want available but out of the way.
console.time, performance.mark, performance.measure
For ad-hoc performance work you don't need the full Performance panel. Label a section and time it:
console.time('data transform');
const result = expensiveTransform(rawData);
console.timeEnd('data transform');
// → data transform: 142.35ms
For finer-grained measurement, performance.mark() and performance.measure() write into the User Timing API, and those marks appear in the Performance panel timeline next to network and rendering activity — exactly where you want them when chasing a 200ms lag across three subsystems.
performance.mark('hydrate-start');
hydrateApp();
performance.mark('hydrate-end');
performance.measure('hydrate', 'hydrate-start', 'hydrate-end');
console.count, console.assert, console.trace
console.count('label') increments a counter every hit — far more useful than console.log('called') after the 47th print. console.assert(condition, message, value) logs only when the condition is false — a lightweight inline invariant check. console.trace() prints the call stack at the moment of invocation, the fastest answer when you have no idea who's calling a function.
Breakpoints, conditional breakpoints, and logpoints
Breakpoints are the most underused tool in DevTools. The trick is knowing the four variants and when each beats the others.
| Type | Where to set it | When it pauses | Best for |
|---|---|---|---|
| Line breakpoint | Click the line number in Sources | Every time that line runs | Inspecting state at a known point |
| Conditional breakpoint | Right-click line → Add conditional breakpoint | Only when an expression is true | Pausing inside a hot loop |
| Logpoint | Right-click line → Add logpoint | Never — just logs the expression | console.log without editing source |
| DOM/event/XHR breakpoint | Sources sidebar panels | When a DOM mutation, event, or fetch happens | Tracing handlers you can't grep for |
Conditional breakpoints — skipping the noise
A plain breakpoint inside a 10,000-iteration loop pauses 10,000 times. A conditional breakpoint pauses only on the iteration that matters:
// In the breakpoint condition field:
items[i].status === 'failed' && items[i].retryCount > 2
You can also use the condition for side effects — console.log(someValue), false logs and never pauses, which is essentially a logpoint with extra steps.
Logpoints — the production-safer console.log
Logpoints, introduced in Chrome DevTools 73, are the underrated middle ground. Right-click a line, pick Add logpoint, and enter an expression. Every time execution reaches that line the expression is logged — without pausing, and without touching the file. No commit noise, no risk of shipping a stray console.log. Tip: wrap a variable in braces — {user} instead of user — and the logpoint prints both name and value.
The debugger statement
debugger; in source code triggers a breakpoint when DevTools is open and is silently ignored when it's closed. Useful in dynamically generated code, in places UI breakpoints don't reach (inside eval, Function() constructors, Web Workers), or when you want the pause point tracked in version control during a branch's life. ESLint's no-debugger rule should catch it before the PR lands.
Event listener breakpoints
Don't know which handler fires when a user clicks the button? Open Event Listener Breakpoints in the Sources sidebar, tick click, click the element. DevTools pauses at the exact handler — yours, a framework's, an ad script's. The same panel covers DOM mutations, XHR/fetch, animation frames, and timers.
Async debugging: the trace that crosses await
Async bugs make experienced engineers lose afternoons — a promise rejects three call frames removed from the code that started it, a Promise.all swallows an error, a microtask runs after the next render. Two upgrades make this manageable.
Async stack traces
Chrome DevTools enables async stack traces by default. When you pause inside an async function or on a thrown error, the Call Stack panel doesn't stop at the synchronous frames — it draws a horizontal Async separator and continues, showing the frames that scheduled the work. If a fetch failure pauses inside .catch, scroll past the separator and you'll see the original fetch() call site, the React handler that triggered it, and the user event that started it.
Pause on caught exceptions
The pause-on-exceptions toggle in Sources has two checkboxes: pause on uncaught, and pause on caught. Turn the second on temporarily and DevTools pauses inside every try/catch — including the ones a library swallows silently. The fastest way to find a bug caught and logged at debug level deep in a dependency.
unhandledrejection for silent failures
Unhandled rejections appear as warnings, easy to miss when the console is busy. A global listener forces them to the surface:
window.addEventListener('unhandledrejection', event => {
  console.error('Unhandled promise rejection:', event.reason);
});
In Node.js: process.on('unhandledRejection', ...). Sentry and Datadog wire this up automatically — locally it's worth adding explicitly.
async/await over .then() chains
If a codebase still leans heavily on .then() chains, that's a debugging tax — stack traces are less informative, breakpoints behave less predictably, and stepping is choppier. Refactoring to async/await is often justified by debugging ergonomics alone.
Console utilities that look like magic
The Chrome DevTools Console exposes a set of Command Line API helpers only available from the console itself. They look obscure on first contact and become essential within a week.
$0 through $4 — the last five inspected elements
Click a node in the Elements panel, switch to the Console, and type $0. You get a JavaScript reference to that node. $1 is the previously selected node, up to $4. So you can inspect a DOM node visually, then call methods on it without typing a querySelector:
$0.getBoundingClientRect();
$0.dataset;
$0.dispatchEvent(new MouseEvent('click'));
$_, $(selector), $$(selector)
$_ holds the result of the last expression — useful for one-liner exploration ($_.then(users => console.table(users)) after a fetch().then(r => r.json())). $('selector') is document.querySelector and $$('selector') is document.querySelectorAll returning a real array. Both are scoped to the console and don't conflict with jQuery's $.
monitorEvents — listen to a node without writing a handler
monitorEvents is one of the highest-leverage tools in DevTools and almost nobody knows about it. Select a DOM node, switch to Console, and run:
monitorEvents($0, 'click');
monitorEvents($0, ['mouse', 'key']);
monitorEvents(document, 'scroll');
Every matching event is logged with its full event object. No addEventListener, no cleanup. When you're done: unmonitorEvents($0). This single utility replaces a great deal of speculative console.log instrumentation.
copy() — copy a value to the clipboard
copy(value) copies anything — a string, an object (serialised as JSON), $0.innerHTML — to the system clipboard. Useful for pulling a payload out of the console and into a test fixture, a curl command, or a Jira ticket: copy(JSON.stringify(state, null, 2)).
getEventListeners(node)
getEventListeners($0) returns every listener attached to a node — including ones you didn't attach. The answer to "why does this element behave as if it has a listener when I never added one" — almost always a framework, router, or analytics tag.
Source maps: why your production stack trace is unreadable
Modern JavaScript is bundled, minified, transpiled, and tree-shaken before it reaches the browser. An error reported as main.abc123.min.js:1:48291 is meaningless against the original UserProfile.tsx. Source maps fix this by mapping compiled output back to original source.
When source maps are wired in, stack traces reference original filenames, the Sources panel shows your TypeScript or JSX rather than the minified bundle, breakpoints set in original files work against the compiled code at runtime, and error monitors (Sentry, Datadog, Bugsnag) de-minify production stack traces.
For Webpack, set devtool: 'source-map' for production or devtool: 'eval-source-map' for faster dev rebuilds. Vite emits source maps in development by default and accepts build.sourcemap: true for production. Rollup, esbuild, and Parcel have equivalent flags. For TypeScript, "sourceMap": true in tsconfig.json.
Publishing source maps publicly exposes your original code to anyone with DevTools. Most teams generate maps in CI and upload them privately to Sentry, Datadog, or Bugsnag — production stack traces stay readable for the team without the maps being public.
A related improvement: framework source maps now ship with an x_google_ignoreList field that tells DevTools which files are framework or node_modules code. Angular, Nuxt, and modern Vite builds emit it by default — see the Ignore List documentation — so stack traces end up showing your code only.
Node.js debugging with --inspect
The same DevTools you use in the browser can debug a Node.js process. Run with the inspector flag:
node --inspect app.js          # start inspector, do not pause
node --inspect-brk app.js      # break on first line
node --inspect=0.0.0.0:9229 server.js  # custom host/port
Open chrome://inspect and click inspect next to your process. You get the full Sources panel, breakpoints, async stack traces, Scope, and the Profiler — pointed at a server process. Use --inspect-brk for startup logic and plain --inspect for steady-state debugging.
For Jest or Vitest: "test:debug": "node --inspect-brk node_modules/.bin/jest --runInBand". The --runInBand flag forces serial execution so breakpoints don't fight worker processes. For Next.js, NODE_OPTIONS=--inspect-brk next dev surfaces a clickable DevTools URL in the error overlay.
The inspector binds to 127.0.0.1 by default. Binding to 0.0.0.0 or a public IP exposes arbitrary code execution to anyone who can reach the port — never do this on a public network. For remote debugging, SSH-tunnel the port: ssh -L 9221:localhost:9229 prod.example.com, then attach DevTools to localhost:9221.
Common JavaScript bugs and how to catch them
A short list of the bugs that consume a disproportionate share of debugging time — and the tools above that catch them fastest.
Type coercion with ==
0 == false; // true
'' == false; // true
null == undefined; // true
'5' == 5; // true
=== checks value and type and eliminates the entire class. ESLint's eqeqeq rule enforces it. Turn it on and treat its output as authoritative.
Cannot read properties of undefined
The most common runtime error in JavaScript. Optional chaining and nullish coalescing handle it without nested guards: const city = user?.address?.city ?? 'Unknown'. When it still appears in production, open the line in Sources, set a breakpoint, and step the chain to find where it goes undefined.
Stale captures in closures
// Bug — all five callbacks log 5
for (var i = 0; i < 5; i++) {
  setTimeout(() => console.log(i), 100);
}

// Fix — let creates a fresh binding per iteration
for (let i = 0; i < 5; i++) {
  setTimeout(() => console.log(i), 100);
}
var is the usual culprit. The same pattern bites with event listeners in loops, Promises in loops, and React effects that depend on a stale closure rather than the current value.
this in callbacks
Regular function callbacks rebind this. Arrow functions inherit it from the enclosing scope:
class Timer {
  count = 0;
  start() {
    // Bug — `this` is undefined or window
    setInterval(function () {
      this.count++;
    }, 1000);
    // Fix — arrow inherits `this` from start()
    setInterval(() => {
      this.count++;
    }, 1000);
  }
}
When this is wrong, set a breakpoint and inspect it in the Scope panel — the binding is shown explicitly there.
Mutation of shared references
function applyDiscount(cart) {
  cart.total *= 0.9; // mutates the caller's cart
  return cart;
}
State managers, memoised selectors, and React's reconciler depend on reference identity. Mutating a shared object breaks change detection in hard-to-trace ways. The DevTools answer: right-click a property in the Scope panel and pick Break on property write — execution pauses the next time anything writes to that field.
Third-party noise in the call stack
Ten frames of React, Redux, or RxJS internals between your frames is exhausting to step through. Right-click a script in the Call Stack panel and pick Add script to ignore list (the rename of Blackbox script). Most teams add node_modules patterns under Settings → Ignore List and never look back.
Network-side debugging that complements the console
Three Network-panel tricks that pair with the debugger.
Copy as fetch. Right-click any request and choose Copy → Copy as fetch. You get a working fetch() call to paste into the console, modify, and replay — useful for poking at an endpoint with different parameters without touching app code.
Block request URL. Right-click a request and pick Block request URL to simulate a failure. Refresh and watch how your app responds when that asset, script, or API never returns — the fastest way to test error states without modifying code.
Throttling and offline. The throughput dropdown simulates Fast 4G, Slow 4G, 3G, or offline. With Disable cache it turns a fast local environment into a passable approximation of hotel Wi-Fi.
Live expressions: the watch panel for the impatient
The DevTools Console has a Create live expression icon — the eye, next to the Filter text box. Click it, enter an expression, and DevTools re-evaluates it every 250ms. Useful for tracking document.activeElement as you tab through a form, watching store.getState().auth.user without React DevTools open, or eyeballing performance.memory.usedJSHeapSize. Live expressions persist across reloads, so you can pin them once and leave them up.
FAQ
How do I debug JavaScript without console.log?
Use breakpoints — line breakpoints for known pause points, conditional breakpoints for hot loops, logpoints when you only want to read values without pausing. The Scope panel shows every variable in scope; the Call Stack panel shows how you got there. Once the workflow clicks, console.log becomes the exception.
What's the difference between a breakpoint and the debugger statement?
A breakpoint is set in DevTools and lives in the browser — it disappears when you close the panel. The debugger statement lives in source code and triggers a pause whenever DevTools is open. Use breakpoints for exploratory debugging, debugger for spots you want to pause at consistently or in code DevTools can't easily target (dynamic scripts, Web Workers).
How do I debug a Node.js application in Chrome DevTools?
Run the process with node --inspect app.js (or --inspect-brk to pause on the first line), open chrome://inspect, and click inspect next to the listed process. You get the full DevTools UI pointed at a server process. For tests, wire --inspect-brk into an npm script alongside --runInBand.
What are logpoints in Chrome DevTools?
Logpoints log an expression every time execution reaches a line, without pausing or modifying source. Right-click a line number, pick Add logpoint, and enter the expression. They vanish when DevTools closes.
How do I trace an async bug across await boundaries?
Chrome DevTools enables async stack traces by default. Set a breakpoint in the failing handler or turn on pause-on-exceptions, and when execution pauses, scroll down the Call Stack panel past the horizontal Async separator. The frames below show where the asynchronous work was scheduled — usually the real source of the bug.
Should I publish source maps to production?
Generate them either way — error monitors need them to produce readable stack traces. Whether to publish them publicly is a separate decision: most teams upload maps privately to Sentry, Datadog, or Bugsnag rather than serving them from the public bundle.
Capture the bug, not just the symptom
The techniques above help you find bugs faster. The other half is the hand-off — because a developer who reproduces a bug on their own machine still has to write it up so the person fixing it can reproduce it too. That's where most context evaporates.
Effective documentation means console logs, network requests, the exact steps taken, the browser and OS, and ideally a recording of the failure. Assembling that manually is the work that gets done incompletely under deadline.
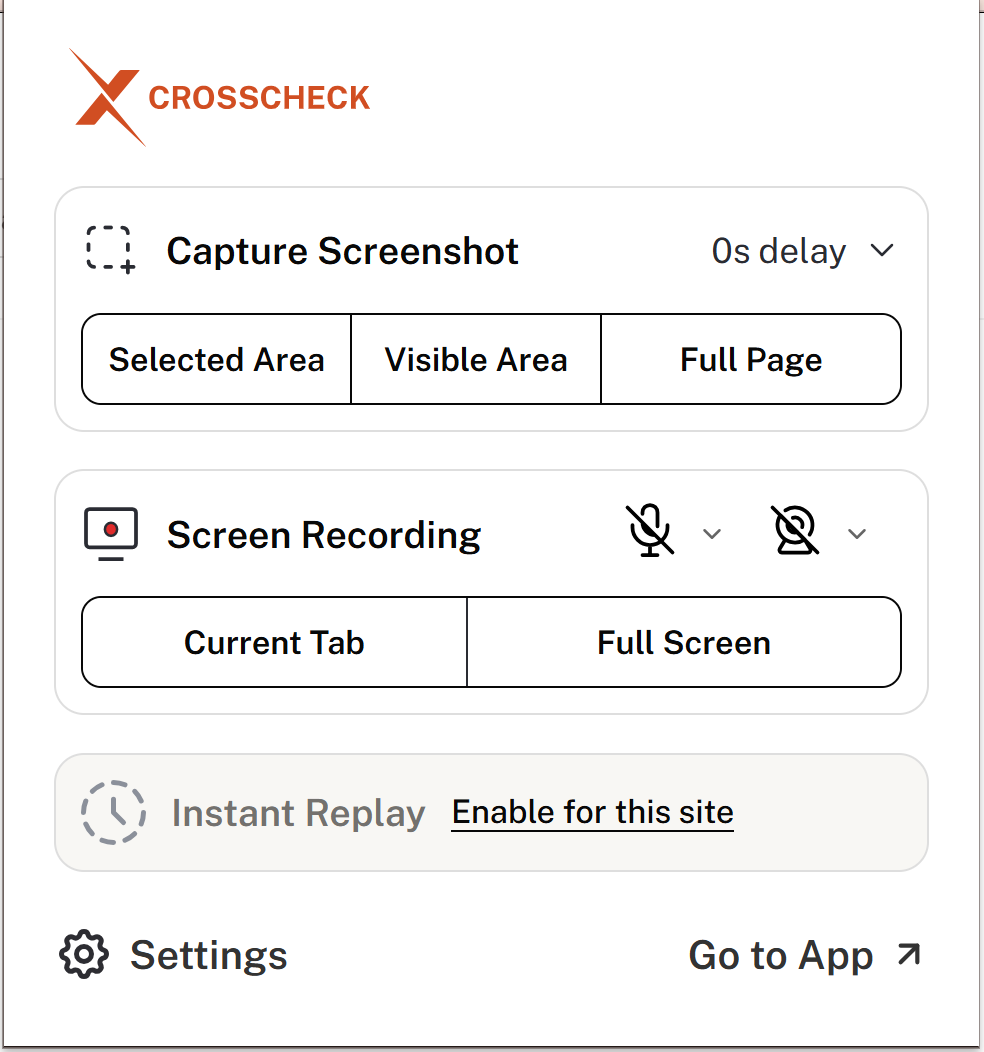
Crosscheck is a free Chrome extension that captures all of it in one click: screenshot, screen recording, every console log and error, every network request, browser metadata, and reproduction steps — bundled into a single report sent straight to Jira, Linear, ClickUp, GitHub, or Slack. The techniques here help you find the bug; Crosscheck makes sure the fix doesn't get stuck in back-and-forth over missing context.
For more on the DevTools side, the Crosscheck team has also written about Chrome DevTools performance auditing, the perfect bug report template, and the best bug reporting tools of 2026.